
Proxmox VE Step-by-Step Installation Guide
Proxmox Virtual Environment represents a leading open-source solution for enterprise-grade virtualization. It features an integrated web interface, enabling straightforward management of virtual machines and containers, along with software-defined storage and networking. Additionally, Proxmox offers capabilities for high-availability clustering and incorporates various ready-to-use tools, all accessible through this singular platform.
🖥️ Installing Proxmox VE on Bare Metal Server
🔑 Prerequisites
- A bare metal server with at least one network interface
- Intel VT/AMD-V capable CPU for hardware virtualization support
- Minimum 2 GB RAM, though 4 GB or more is recommended for better performance
- At least 8 GB of disk space, SSDs preferred for improved I/O performance
- A bootable USB drive or CD/DVD containing the Proxmox VE installer
- An active Internet connection for downloading updates and packages
📀 Operating System
Proxmox is a Debian-based distribution, integrating its own modified Linux Kernel. It’s designed to be installed on bare metal, eliminating the need for a separate base operating system. Proxmox installation closely mirrors the process of installing Debian, offering a straightforward and user-friendly experience. Simply boot from the Proxmox ISO, and the installation guide will lead you through the process. Opting for Proxmox installed from its ISO ensures a stable and clean system setup, making it an excellent choice for a reliable and efficient virtualization environment. Installation from official Proxmox ISO IS RECOMMENDED.
🔧 Installation Steps
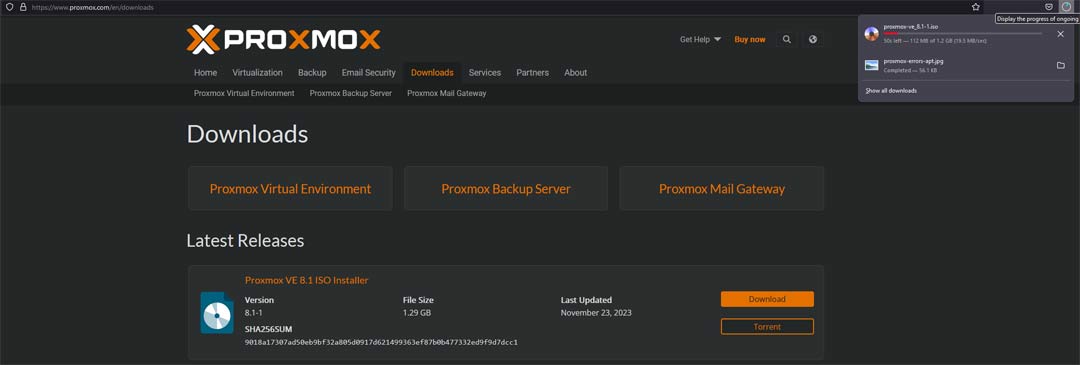
1. Download the Proxmox VE ISO: Obtain the latest ISO from the Proxmox website.
2. Create a Bootable USB/CD: Use Rufus (recommended), balenaEtcher, or a similar tool to make your installation media.
3. Boot from the USB/CD: Insert it into your server and boot. Adjust your BIOS/UEFI settings to prioritize booting from the USB/CD.
4. Follow the Installation Wizard: Choose your language, country, keyboard layout, disk to install on, and set up your network.
5. Set Root Password and Email: Choose a secure password for the root account and provide a valid email address.
6. Reboot and Access the Web Interface: After installation, reboot and access https://<your-server-IP>:8006.
7. Log in with ‘root’: Use the root account and your set password to log in.
8. Update and Configure: Update your system and begin configuring Proxmox VE for your needs.
🐧 Installing Proxmox VE on Existing Debian/Ubuntu Systems
While Proxmox VE is typically installed on a clean dedicated server, it’s also possible to install it atop an existing Debian or Ubuntu system. This approach is more complex and may not be suitable for production environments. (NOT RECOMMENDED). This guide will walk you through the process of installing Proxmox VE on top of an existing Debian or Ubuntu installation. This method is more complex than a clean install and is generally recommended for experienced users or for testing environments.
📖 Detailed Steps for Debian/Ubuntu
1. Update Your System
Ensure that your current system is up-to-date.
sudo apt-get update && sudo apt-get upgrade
This command updates the package lists and upgrades all your installed packages to their latest versions.
2. Add the Proxmox VE Repository
Add the Proxmox VE repository to your system’s repository list.
echo "deb http://download.proxmox.com/debian/pve buster pve-no-subscription" | sudo tee /etc/apt/sources.list.d/pve-install-repo.list
This command adds the Proxmox VE repository. Replace ‘buster’ with your Debian version codename or use ‘buster’ if you are on Ubuntu.
3. Add the Proxmox VE Repository GPG Key
Import the Proxmox VE repository GPG key to authenticate the packages.
wget http://download.proxmox.com/debian/proxmox-ve-release-6.x.gpg -O- | sudo apt-key add -
This command downloads and adds the Proxmox VE GPG key. Note that the key version may change, so please check the Proxmox website for the latest key.
4. Update Package Lists
Update your package lists to include the Proxmox VE repository.
sudo apt-get update
This refreshes your package list, including the newly added Proxmox repository.
5. Install Proxmox VE Packages
Install the full set of Proxmox VE packages, including KVM and LXC.
sudo apt-get install proxmox-ve postfix open-iscsi
This command will install Proxmox VE along with postfix (for mail) and open-iscsi (for iSCSI support).
6. Optional: Remove the OS Kernel
If you’re installing on Debian, you might want to remove the Debian standard kernel.
sudo apt-get remove 'linux-image-.*'
This command removes the existing Debian kernel. Note that this step is optional and should be performed with caution.
7. Reboot
Once the installation is complete, reboot your system.
sudo reboot
This command will reboot your system, allowing Proxmox VE to start.
8. Access the Proxmox VE Web Interface
After rebooting, you can access the Proxmox VE web interface via your web browser.
Navigate to https://[Your_Server_IP]:8006. Congratulations! You have installed the Proxmox VE.
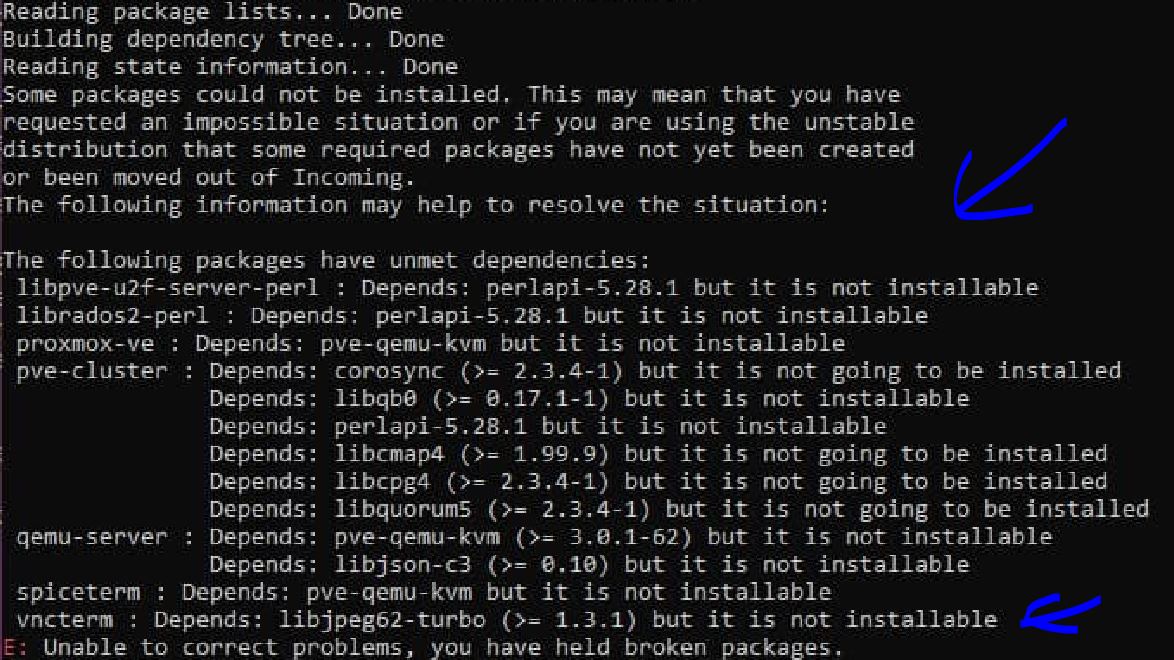
⚠️ Important Notes⚠️
Installing Proxmox VE on Ubuntu can be tricky due to differences in package management and system configurations. It is generally more straightforward and stable to use original installation ISO as a base for Proxmox VE.
Post-Installation Steps for Proxmox VE
After installing Proxmox VE, there are several key steps and optimizations you can perform to enhance the performance and functionality of your virtualization environment.
Updating the System
It’s crucial to start by updating your system to ensure all components are current.
apt-get update && apt-get dist-upgrade
This command updates the list of available packages and their versions and then installs the newest versions of the packages you have.
Configuring Networks
Setting up a proper network configuration is essential for Proxmox VE.
vim /etc/network/interfaces
Use this command to edit the network configuration file. Here you can set up bridges or VLANs as required for your environment.
System Tuning for Better Performance
Optimizing your system can significantly enhance performance, especially in a virtualized environment.
Adjusting the Swappiness
sysctl vm.swappiness=10
This command reduces the swappiness of the system, which can improve overall performance by reducing the reliance on swap space in favor of RAM.
Enabling I/O Scheduler
echo 'deadline' > /sys/block/[DEVICE]/queue/scheduler
Replace ‘[DEVICE]’ with your disk device ID. This command sets the I/O scheduler to ‘deadline’, which can improve the performance for virtualization workloads.
Setting Up a Backup Solution
Backups are critical for any virtualization environment.
vzdump 101 --storage local --mode snapshot
This command creates a backup of the VM/container with ID 101, storing it locally and using snapshot mode if available.
Monitoring and Maintenance
Regular monitoring and maintenance are key to a healthy Proxmox environment.
apt-get install htop iftop
This installs ‘htop’ and ‘iftop’, tools for monitoring system resources and network traffic, respectively.
Setting Up High-Availability Cluster
If you’re running multiple Proxmox servers, setting up a high-availability cluster can prevent downtime.
pvecm create [CLUSTERNAME]
This command initializes a new cluster with the specified name.
Conclusion
Following these steps after installing Proxmox VE can greatly enhance your server’s performance and reliability. Regular updates, backups, and monitoring are essential for maintaining a healthy virtualization environment.

This article incorporates information and material from various online sources. We acknowledge and appreciate the work of all original authors, publishers, and websites. While every effort has been made to appropriately credit the source material, any unintentional oversight or omission does not constitute a copyright infringement. All trademarks, logos, and images mentioned are the property of their respective owners. If you believe that any content used in this article infringes upon your copyright, please contact us immediately for review and prompt action.
This article is intended for informational and educational purposes only and does not infringe on the rights of the copyright owners. If any copyrighted material has been used without proper credit or in violation of copyright laws, it is unintentional and we will rectify it promptly upon notification. Please note that the republishing, redistribution, or reproduction of part or all of the contents in any form is prohibited without express written permission from the author and website owner. For permissions or further inquiries, please contact us.
More stories