PIP Installation and Usage Across Operating Systems: A Step-by-Step Guide to Python’s Package Installer
Table of Contents
- How to Install and Update Pip on Windows
- How to Install and Update Pip on Linux – Ubuntu
- How to Install and Update Pip on Linux – CentOS
- How to Install Any Packages Using Pip
- How to Install Specific Version of Package with Pip
- How to Install Local Package with Pip
- Pip Install Not Working: Common Errors
- Pip Install sqlite3, boto3, jupyterlab, dotenv, pillow, sqlite3
- Verbose and Other Pip Install Options
How to Install and Update Pip on Windows
🪛 To install and update Pip on Windows, follow these simple steps:
1. Open the command prompt by pressing the Windows key + R, then type “cmd” and hit Enter.
2. Check if Pip is already installed by running the command pip --version. If it’s not installed, you’ll see an error message.
3. To install Pip, download the get-pip.py file from the official Python website (https://bootstrap.pypa.io/get-pip.py). Save it to a folder on your computer.
4. Navigate to the folder where you saved get-pip.py using the command cd path/to/folder.
5. Install Pip by running the command python get-pip.py. This will download and install Pip on your system.
6. To update Pip to the latest version, use the command pip install --upgrade pip. This will ensure you have the most recent version of Pip installed.
7. Verify the installation and update by running pip --version again. You should see the updated version number.
🎉🎉🎉That’s it! You have successfully installed and updated Pip on your Windows system. Now you can use Pip to easily manage and install Python packages.

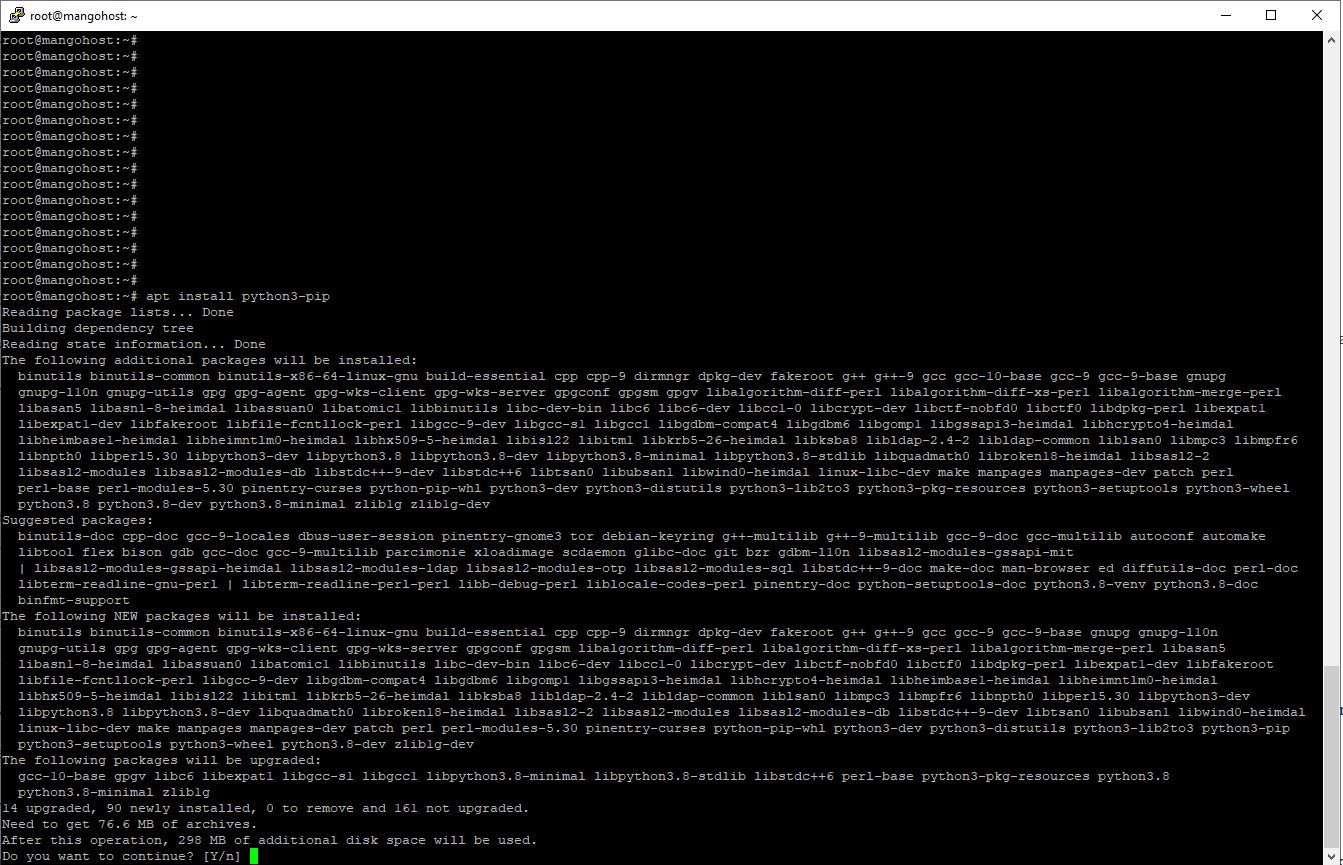
How to Install and Update Pip on Ubuntu
🪛 To install and update Pip on Linux – Ubuntu, follow these simple steps:
1. Open the terminal by pressing Ctrl+Alt+T or searching for “Terminal” in the applications menu.
2. Check if Pip is already installed by running the command pip --version. If it’s not installed, you will see an error message.
3. Install Pip by executing the command sudo apt install python3-pip. This command will prompt you to enter your password.
4. After the installation is complete, verify the installation by running pip --version. You should see the version number displayed.
5. To update Pip to the latest version, use the command pip install --upgrade pip. This will upgrade Pip to the newest available version.
6. Verify the update by running pip --version again. The version number should now reflect the latest update.
🐍 That’s it! You have successfully installed and updated Pip on your Ubuntu Linux system. Pip is a powerful package management tool for Python, allowing you to easily install and manage Python packages and libraries. 💻
How to Install and Update Pip on CentOS
🪛 To install and update Pip on Linux CentOS, follow these steps:
1. Open a terminal window.
2. Update the system’s package list by running the command: sudo yum update.
3. Install Pip by executing the command: sudo yum install epel-release.
4. Once the installation is complete, verify Pip’s version by typing: pip --version.
5. To update Pip to the latest version, use the command: sudo pip install --upgrade pip.
6. Confirm the successful update by checking the version again: pip --version.
🐍🐍🐍 Feel free to explore the vast collection of Python packages available on PyPI and enhance your development experience. Happy coding! 🐍✨
How to Install Any Packages Using Pip
🔩 Installing packages using pip is a straightforward process that allows you to easily add new functionality to your Python projects. Here’s a step-by-step guide on how to install any packages using pip:
1. Open your command prompt or terminal.
2. Check if pip is installed by typing pip --version. If it’s not installed, you can install it by following the official pip installation guide.
3. Once pip is installed, you can use it to install packages. To install a package, type pip install package_name in the command prompt. Replace package_name with the name of the package you want to install.
4. Press Enter, and pip will download and install the package along with its dependencies.
5. You can also specify a specific version of a package by adding ==version_number after the package name. For example, pip install package_name==1.0.2.
6. To upgrade a package to its latest version, use the command pip install --upgrade package_name.
7. To uninstall a package, type pip uninstall package_name.
8. Finally, you can list all installed packages by running pip list.
🎉 Congratulations! You now know how to install, upgrade, and uninstall packages using pip. Enjoy exploring the vast 🐍🐍Python🐍🐍 ecosystem and enhancing your projects with new functionalities!
How to Install Specific Version of Package with Pip 🔩
To install a specific version of a package using pip, follow these steps:
1. Open your command prompt or terminal.
2. Check if pip is installed by running the command pip --version. If not, install pip by following the official documentation.

3. Once pip is installed, you can use the command pip install package_name==version_number to install a specific version of a package. Replace package_name with the name of the package you want to install and version_number with the desired version.
4. If you are unsure about the available versions of a package, you can use the command pip search package_name to list all available versions.
5. To upgrade or downgrade an already installed package to a specific version, use the command pip install --upgrade package_name==version_number.
6. If you encounter any issues during installation, you can try using the --no-cache-dir flag to avoid using cached files, or the --user flag to install the package only for the current user.
That’s it! You have successfully installed a specific version of a package using pip. Enjoy coding! 🎉
How to Install Local Package with Pip 🔩
1. Open your command prompt or terminal.
2. Navigate to the directory where the package is located using the `cd` command. For example, if the package is in the “Downloads” folder, type cd Downloads and press Enter.
3. Ensure that you have the latest version of pip installed by running the command pip install --upgrade pip.
4. Now, install the local package using the command pip install .. The dot represents the current directory, indicating that you want to install the package from the current location.
5. Pip will automatically detect the package’s setup.py file and install the package along with its dependencies.
6. Once the installation is complete, you can import and use the package in your Python scripts.
📝 Note: Make sure the package has a valid setup.py file, as it is necessary for pip to install the package correctly.
🎉 By following these steps, you can easily install a local package using pip. Enjoy exploring and utilizing the functionality provided by the package! 🚀
Pip Install Not Working: Common Errors
Pip is a package management system used to install and manage software packages written in Python. However, there are times when pip install encounters errors that prevent it from working properly. Here are some common errors and their possible solutions:
🔴 “ModuleNotFoundError: No module named ‘pip'”: This error suggests that pip is not installed. To fix it, try running the command python -m ensurepip --upgrade to ensure pip is installed correctly.
🔴 “PermissionError: [Errno 13] Permission denied”: This error occurs when pip doesn’t have sufficient permissions to install packages. Use the command pip install --user package_name to install packages locally.
🔴 “ConnectionError: [Errno 11001] getaddrinfo failed”: This error indicates a network issue. Check your internet connection and try again.
🔴 “SyntaxError: invalid syntax”: This error often occurs when the command is mistyped. Double-check the syntax and try again.
🔴 “PackageNotFoundError: Package ‘package_name’ not found”: This error suggests that the package you are trying to install doesn’t exist. Verify the package name and try again.
🔧 Remember to always update pip using pip install --upgrade pip to ensure you have the latest version. If the issue persists, consult the official pip documentation or seek help from the Python community. 🐍
Pip examples – Install sqlite3, boto3, jupyterlab, dotenv, pillow, or any other
To install the required Python packages, you can use the pip install command followed by the package name. For example, some popular packages:
1. `sqlite3`: This package provides a lightweight and self-contained database engine. It can be installed using the command: pip install sqlite3.
2. `boto3`: This package is the official AWS SDK for Python. It allows you to interact with various AWS services. Install it using: pip install boto3.
3. `jupyterlab`: This package provides a web-based interactive development environment for Jupyter notebooks. Install it using: pip install jupyterlab.
4. `dotenv`: This package allows you to load environment variables from a `.env` file. It can be installed using: pip install dotenv.
5. `pillow`: This package is a powerful image processing library. It provides support for opening, manipulating, and saving many different image file formats. Install it using: pip install pillow.
PIP Usage
pip <command> [options]
Commands:
install: Install packages.
download: Download packages.
uninstall: Uninstall packages.
freeze: Output installed packages in requirements format.
list: List installed packages.
show: Show information about installed packages.
check: Verify installed packages have compatible dependencies.
config: Manage local and global configuration.
search: Search PyPI for packages.
wheel: Build wheels from your requirements.
hash: Compute hashes of package archives.
completion: A helper command used for command completion.
debug: Show information useful for debugging.
help: Show help for commands.
General Options:
-h, –help: Show help.
–isolated: Run pip in an isolated mode, ignoring environment variables and user configuration.
-v, –verbose: Give more output. Option is additive, and can be used up to 3 times.
-V, –version: Show version and exit.
-q, –quiet: Give less output. Option is additive, and can be used up to 3 times (corresponding to WARNING, ERROR, and CRITICAL logging levels).
–log <path>: Path to a verbose appending log.
–proxy <proxy>: Specify a proxy in the form [user:passwd@]proxy.server:port.
–retries <retries>: Maximum number of retries each connection should attempt (default 5 times).
–timeout <sec>: Set the socket timeout (default 15 seconds).
–exists-action <action>: Default action when a path already exists: (s)witch, (i)gnore, (w)ipe, (b)ackup, (a)bort.
–trusted-host <hostname>: Mark this host or host:port pair as trusted, even though it does not have valid or any HTTPS.
–cert <path>: Path to alternate CA bundle.
–client-cert <path>: Path to SSL client certificate, a single file containing the private key and the certificate in PEM format.
–cache-dir <dir>: Store the cache data in <dir>.
–no-cache-dir: Disable the cache.
–disable-pip-version-check: Don’t periodically check PyPI to determine whether a new version of pip is available for download. Implied with –no-index.
–no-color: Suppress colored output
–no-python-version-warning: Silence deprecation warnings for upcoming unsupported Pythons.
Verbose and Other Pip Install Options
When using the pip install command, there are several options available to enhance your installation process. One such option is the --verbose flag. By using this flag, you can obtain a more detailed output during the installation, which can be helpful for troubleshooting or understanding the installation steps.
For example, you can run pip install --verbose package_name to see a verbose output of the installation process for a specific package.
Additionally, there are other useful options you can use with pip install. The --upgrade flag allows you to upgrade an already installed package to the latest version. This can be done by running pip install --upgrade package_name.
Another option is --force-reinstall, which forces the reinstallation of a package even if it is already installed. This can be useful if you suspect that the installed package is corrupted or if you want to ensure a clean installation.
Lastly, the --no-cache-dir flag disables the cache during the installation process, which can be helpful if you want to avoid using cached files.
These options provide flexibility and control over the installation process, allowing you to customize it according to your needs. 🚀
Conclusion
Mastering the art of installing pip is essential for any Python developer. With its easy-to-use interface and vast library of packages, pip simplifies the process of installing and managing dependencies, saving valuable time and effort. 💻
Throughout this step-by-step guide, we have explored the various methods of installing pip, including the use of the Python package manager and the command line. We have also highlighted the importance of virtual environments in maintaining project-specific dependencies, ensuring a clean and organized development environment. 📦
By following the instructions provided, developers can confidently navigate the installation process, avoiding common pitfalls and errors. Additionally, we have emphasized the significance of regularly updating pip to access the latest features and security patches, ensuring optimal performance and stability. ⚡ Python’s package installer, pip, is a powerful tool that simplifies the installation and management of packages. By mastering its usage, developers can enhance their productivity and streamline their development ⚡workflow. Good luck and be happy like this python programmer 🙂


This article incorporates information and material from various online sources. We acknowledge and appreciate the work of all original authors, publishers, and websites. While every effort has been made to appropriately credit the source material, any unintentional oversight or omission does not constitute a copyright infringement. All trademarks, logos, and images mentioned are the property of their respective owners. If you believe that any content used in this article infringes upon your copyright, please contact us immediately for review and prompt action.
This article is intended for informational and educational purposes only and does not infringe on the rights of the copyright owners. If any copyrighted material has been used without proper credit or in violation of copyright laws, it is unintentional and we will rectify it promptly upon notification. Please note that the republishing, redistribution, or reproduction of part or all of the contents in any form is prohibited without express written permission from the author and website owner. For permissions or further inquiries, please contact us.
More stories