
Most Popular IP Address 192.168.1.1: Unraveling its Significance and Applications
In home networking, the IP address 192.168.1.1 plays a crucial role as it serves as the default gateway for accessing your router’s admin panel. We will explore the significance and applications of this IP address, including configuring network settings, enhancing security by closing access from external IPs, and comparing it to other common default IP addresses. Additionally, it provides insights into the devices that can use 192.168.1.1, default credentials for routers, and instructions on accessing it through various operating systems and mobile devices. Furthermore, it addresses common issues and offers solutions if 192.168.1.1 is not working.
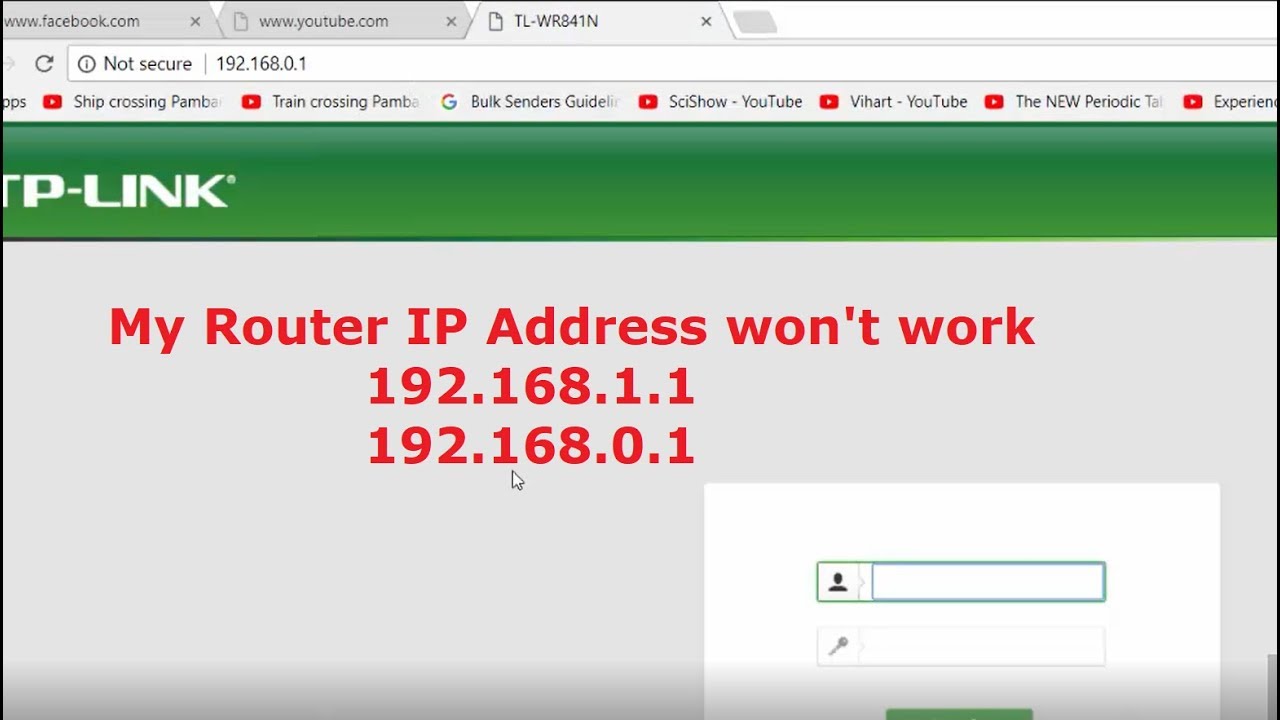
Table of Contents
- The Role of 192.168.1.1 in Home Networking
- Accessing Your Router’s Admin Panel via 192.168.1.1
- Configuring Your Network Settings Through 192.168.1.1
- Security Implications of 192.168.1.1: Preventing Access from External IPs
- 192.168.1.1 vs Other Common Default IP Addresses
- What Devices Can Use 192.168.1.1
- Default Login Credentials for Routers Using 192.168.1.1
- How to Access 192.168.1.1: A Step-by-Step Guide
- Commands to Test 192.168.1.1 Accessibility: Windows, Linux, MacOS
- Commands to Test 192.168.1.1 Accessibility from iPhone and Android
- Can I Change the Default Gateway IP Address?
- Troubleshooting: What to Do if 192.168.1.1 Is Not Working
The Role of 192.168.1.1 in 🏠🌐 Home Networking
192.168.1.1 is a common default IP address used by many home routers as their gateway. It plays a crucial role in home networking by serving as the access point to configure and manage your network settings. 🖥️🔧
When you enter 192.168.1.1 in your web browser, you gain access to the router’s administration panel. Here, you can customize various aspects of your network, such as setting up Wi-Fi passwords, managing connected devices, and configuring security settings. 🛡️🔒
To access the administration panel, connect your device to the router either via Ethernet cable or Wi-Fi. Open your preferred web browser and type “192.168.1.1” in the address bar. You will be prompted to enter a username and password, which are usually provided by the router manufacturer. Once logged in, you can navigate through the available options to modify your network settings. ⚙️🔍
Some common commands available in the administration panel include changing the network name (SSID), enabling port forwarding, setting up parental controls, and updating firmware. These commands can help optimize your home network for better performance and security.
Remember, 192.168.1.1 is just one of the many possible default IP addresses used by routers. If it doesn’t work for your router, consult the manufacturer’s documentation or try other common default IP addresses like 192.168.0.1 or 192.168.1.254. 📚🔍
In conclusion, 192.168.1.1 serves as the gateway to your home network, allowing you to configure and manage various settings to ensure a secure and efficient network environment. 💻🌐
Accessing Your Router’s Admin Panel via 192.168.1.1

To access your router’s admin panel, you can use the default gateway address 192.168.1.1. This address allows you to configure various settings and manage your network. Here’s a simple guide to help you get started:
1. Connect your device (computer, laptop, or smartphone) to the router’s network.
2. Open a web browser and enter “192.168.1.1” in the address bar.
3. Press Enter, and you will be directed to the router’s login page.
4. Enter the default username and password provided by your router manufacturer. If you don’t know them, check the router’s manual or search online for the default credentials.
5. Once logged in, you will have access to the router’s admin panel.
In the admin panel, you can configure various settings such as network name (SSID), password, security options, port forwarding, and more. It’s important to note that each router manufacturer may have a different admin panel layout and available commands.
Here are some commonly available commands in the router’s admin panel:
– Wireless settings: Configure Wi-Fi network name, password, and security type.
– Network settings: Set up IP address, subnet mask, and DNS server.
– Firewall settings: Manage firewall rules and security options.
– Port forwarding: Redirect incoming connections to specific devices on your network.
– Firmware update: Check for and install the latest router firmware.
Remember to save any changes you make in the admin panel to ensure they take effect. Happy configuring! 😊
Configuring Your Network Settings Through 192.168.1.1

Once you access the administration panel, you will be prompted to enter your username and password.
After successfully logging in, you can modify various network settings. Some available commands include:
1. Wireless Settings: Here, you can change your Wi-Fi network name (SSID) and password, adjust the wireless channel, enable or disable guest networks, and set up security protocols like WPA2.
2. LAN Settings: This section allows you to configure your local area network settings, such as IP address, subnet mask, and DHCP server settings.
3. Port Forwarding: If you need to access specific services or applications from outside your network, you can set up port forwarding to redirect incoming traffic to the appropriate device.
4. Firewall Settings: You can enable or disable the firewall, create custom rules to allow or block specific traffic, and set up virtual private network (VPN) passthrough.
Subnet Mask for 192.168.1.1
Remember to save your changes after configuring each setting. It’s also recommended to keep a record of your original settings in case you need to revert any changes. 📝 By utilizing the administration panel at 192.168.1.1, you can easily configure and customize your network settings to suit your needs.
🔒 Security Implications of 192.168.1.1: Preventing Access from External IPs
Allowing external access to this IP can pose significant security risks. To safeguard your network, it is crucial to prevent access from external IPs. Here’s how you can achieve this:
1️⃣ Access your router’s settings by typing “192.168.1.1” in your web browser.
2️⃣ Login using your administrator credentials.
3️⃣ Navigate to the “Firewall” or “Security” section.
4️⃣ Look for an option called “Remote Management” or “Remote Access.”
5️⃣ Disable this feature to prevent external access.
6️⃣ Save the changes and exit the settings.
By disabling remote access, you ensure that only devices within your local network can access the router’s administration interface. This prevents unauthorized access and potential security breaches. Remember to periodically update your router’s firmware to patch any vulnerabilities. Additionally, consider changing the default login credentials and enabling strong encryption protocols like WPA2 for your Wi-Fi network. Implementing these security measures will help protect your network from external threats and ensure a safer online experience. Stay vigilant! 🔐
🌐 192.168.1.1 vs Other Common Default IP Addresses
When it comes to default IP addresses, 192.168.1.1 stands out as one of the most commonly used addresses. However, it is important to understand how it compares to other default IP addresses.
192.168.1.1 is often used as the default gateway for many routers, allowing users to access their router’s settings and configurations. It provides a convenient way to manage network settings, security, and other features. Some common commands available for this IP address include:
ipconfig – Displays the IP configuration of the device.
ping – Tests the connectivity between the device and the IP address.
tracert – Traces the route packets take to reach the IP address.
In comparison, other common default IP addresses like 192.168.0.1 and 192.168.1.254 serve similar purposes. They also offer access to router settings and configurations. However, the specific commands available may vary depending on the router manufacturer and model.
What Devices Can Use 192.168.1.1

Default Login Credentials for Routers Using 192.168.1.1
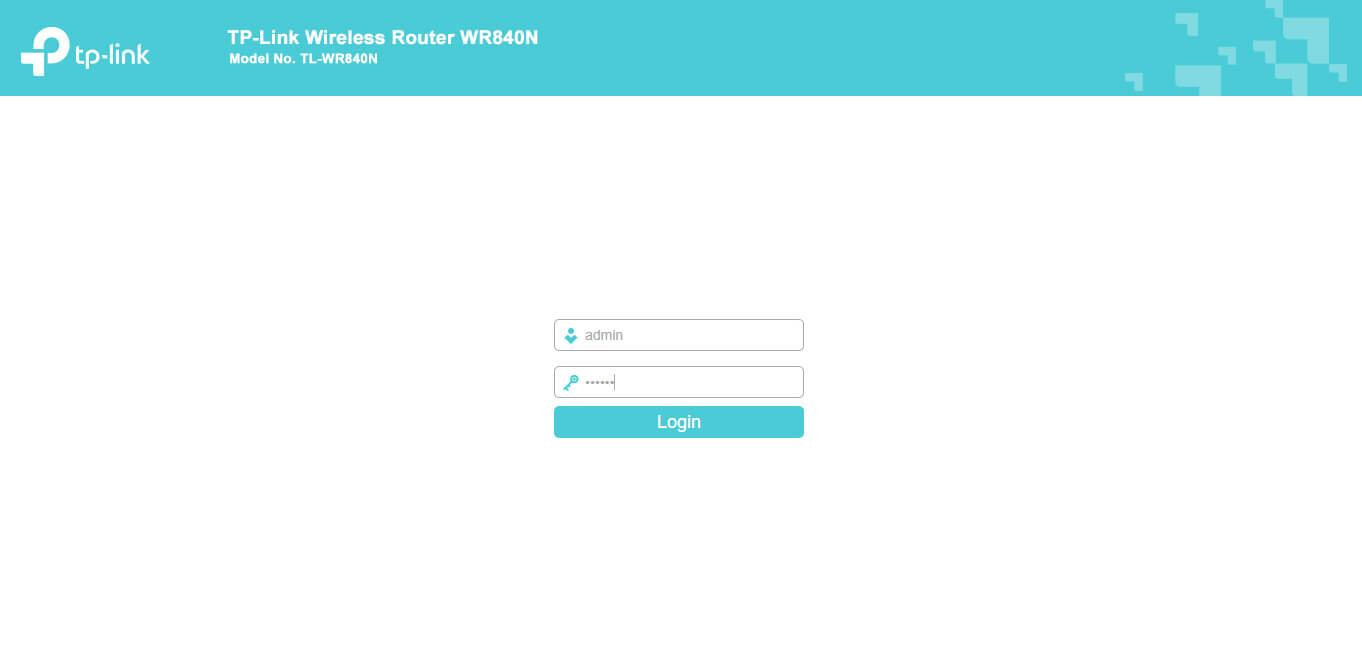
When setting up a new router, it is essential to access its settings through a web browser. Many routers use the default IP address 192.168.1.1 for this purpose. To log in, you will need the default username and password. 🌐
The most common default credentials for routers using 192.168.1.1 are as follows:
– Username: admin
– Password: admin
The default login credentials for routers can vary by manufacturer and model. However, there are common defaults that many models use. Here are the typical default logins for Linksys, Cisco, TP-Link, and D-Link routers:
- Linksys Routers
- Default IP: 192.168.1.1
- Default Username: admin
- Default Password: admin or [none] (Some models do not have a default password and you just leave the field blank.)
- Cisco Routers
- Default IP: 192.168.1.1
- Default Username: admin or cisco
- Default Password: admin, cisco, or [none]
- TP-Link Routers
- Default IP: 192.168.1.1 (or 192.168.0.1 in some models)
- Default Username: admin
- Default Password: admin
- D-Link Routers
- Default IP: 192.168.1.1 (or 192.168.0.1 in some models)
- Default Username: admin
- Default Password: admin or [none]
However, it is crucial to note that some routers may have different default login credentials. It is recommended to consult the router’s manual or the manufacturer’s website for accurate information. 🔍
Other possible combinations:
Login: root, password root
Login: root, password <blank>
Login: administrator, password administrator
Login: <blank>, password <blank>
Remember to change the default login credentials after accessing the router’s settings to enhance the security of your network. 🔒
📝 How to Access 192.168.1.1: A Step-by-Step Guide
To access the IP address 🌐 192.168.1.1, follow these simple steps:
1️⃣ Ensure your device is connected to the network. Open a web browser (e.g., Chrome, Firefox).
2️⃣ Type “192.168.1.1” into the address bar and press Enter. This is the default IP address for many routers.
3️⃣ You will be directed to the router’s login page. If prompted, enter the username and password. (Note: If you haven’t changed these, try “admin” for both.)
4️⃣ Once logged in, you can access the router’s settings and configuration options. Explore the various tabs and menus to customize your network settings.
⚠️ Remember, altering settings without proper knowledge can affect your network’s functionality. Proceed with caution and consult the router’s manual or manufacturer’s website if needed.
🔒 If you encounter login issues, try resetting the router to its factory settings. Locate the reset button (usually at the back) and press it for about 10 seconds. This will restore default login credentials.
🌟 Now you can access and manage your router’s settings through 192.168.1.1! Enjoy a personalized and secure network experience. 🚀
Available commands:
– ipconfig: Displays IP configuration information.
– ping 192.168.1.1: Checks the connectivity to the IP address.
– tracert 192.168.1.1: Traces the route to the IP address.
📝Commands to Test 192.168.1.1 Accessibility: Windows, Linux, MacOS
To ensure the accessibility of the IP address 192.168.1.1, you can use the following commands on different operating systems:

💻 Windows:
1. Open the Command Prompt by pressing Win + R, then type “cmd” and hit Enter.
2. Ping the IP address using the command: ping 192.168.1.1.
3. Check the response time and packet loss to assess accessibility.
🐧 Linux:
1. Open the Terminal by pressing Ctrl + Alt + T.
2. Use the ping command: ping 192.168.1.1.
3. Observe the output to determine if the IP address is accessible.
🍎 MacOS:
1. Launch the Terminal from the Applications folder or by using Spotlight.
2. Execute the ping command: ping 192.168.1.1.
3. Analyze the results to verify the accessibility of the IP address.
These commands allow you to test the accessibility of 192.168.1.1 on different operating systems. Remember to replace the IP address with the one you want to test. Happy testing! ✨
Commands to Test 192.168.1.1 Accessibility from iPhone and Android
To test the accessibility of 192.168.1.1 from your iPhone or Android device, you can follow these simple steps.
1. Connect your iPhone or 📱 Android device to the same network as the 192.168.1.1 IP address.
2. Install application that allows to scan your network, like Port Scanner or any other.
3. Enter 192.168.1.1 and press enter. This will send a port scan requiest and check if it is reachable. You should see the response time and packet loss, if any.
By using these commands, you can assess the accessibility of 192.168.1.1 🌐 from your iPhone or Android device.
Can I Change 🤔 the Default Gateway IP Address?
You can change the default gateway IP address on your Wi-Fi router. The default gateway is the IP address used by devices in your network to communicate with the router and through it, to the outside internet. Here’s a general guide on how to change it:
- Access the Router’s Admin Interface:
- Connect to your Wi-Fi network.
- Open a web browser and enter your router’s current default gateway IP (like 192.168.1.1, 192.168.0.1, etc.).
- Enter your admin username and password.
- Find the LAN Settings:
- Look for a section named “LAN Settings,” “Network Settings,” or something similar.
- This section is usually under the “Setup” or “Basic Setup” menu.
- Change the Default Gateway IP:
- In the LAN settings, you will find a field for the IP address, which is your default gateway IP.
- Change this to your desired IP address (e.g., changing from 192.168.1.1 to 192.168.2.1).
- Ensure the new IP is within a valid private IP address range and not being used by any other device on your network.
- Save and Reboot:
- Save the settings.
- Your router may reboot to apply the changes.
- Update Connected Devices:
- After changing the default gateway IP, you’ll need to reconnect your devices to the network.
- For devices with static IP addresses, you’ll need to update their network settings to match the new gateway IP.
- Potential Issues:
- Be careful when changing IP settings. Incorrect configurations can lead to network connectivity issues.
- If you encounter problems, you can usually reset the router to its factory settings to revert to the default IP.
Important Note: The exact steps and terminology can vary depending on the router’s make and model. If in doubt, refer to your router’s manual or online support for specific instructions. Changing network settings can cause connectivity issues if not done correctly, so proceed with caution, especially if you’re not familiar with network configurations.
Troubleshooting: What to Do if 192.168.1.1 Is Not Working

If you are unable to access 192.168.1.1, don’t panic! 🚫🔌 Here are some steps to help you troubleshoot the issue:
1. Check your network connection. Ensure that your device is connected to the correct network and has a stable internet connection. 📶
2. Restart your router. Unplug the power cable, wait for a few seconds, and then plug it back in. This can often resolve temporary glitches. ♻️
3. Clear your browser cache. Sometimes, cached data can interfere with accessing the router’s login page. Clearing the cache can help. 🗑️
4. Try using a different browser or device. It’s possible that the issue lies with your current browser or device. Switching to an alternative can help identify the problem. 💻📱
5. Reset your router. As a last resort, you can reset your router to its factory settings. Use the reset button on the back of the router, but be aware that this will erase any customized settings. ⚠️
If none of these steps work, you may need to contact your internet service provider or consult the router’s manual for further assistance. Good luck! 🤞
Available commands:
ipconfig
ping 192.168.1.1
tracert 192.168.1.1
Conclusion
In conclusion, the IP address 192.168.1.1 holds immense significance in the realm of networking and connectivity. 🌐 Its widespread usage as a default gateway address for various routers and modems makes it a crucial element in establishing a stable and secure network connection. Understanding the intricacies of this IP address is essential for network administrators and enthusiasts alike.
🔒 The security aspect of 192.168.1.1 cannot be overlooked. It serves as a gateway for configuring network settings, enabling users to protect their network from potential threats. Implementing robust security measures is imperative to safeguard sensitive information and prevent unauthorized access.
Furthermore, the applications of 192.168.1.1 extend beyond its role as a gateway. It facilitates network troubleshooting, allowing users to diagnose and resolve connectivity issues efficiently. Additionally, it serves as a platform for accessing the router’s administrative panel, granting users control over various network settings.
Overall, comprehending the significance and applications of the IP address 192.168.1.1 is crucial for anyone involved in networking. 📡 Its role in establishing secure connections, configuring settings, and troubleshooting issues makes it an indispensable element in the digital landscape.

This article incorporates information and material from various online sources. We acknowledge and appreciate the work of all original authors, publishers, and websites. While every effort has been made to appropriately credit the source material, any unintentional oversight or omission does not constitute a copyright infringement. All trademarks, logos, and images mentioned are the property of their respective owners. If you believe that any content used in this article infringes upon your copyright, please contact us immediately for review and prompt action.
This article is intended for informational and educational purposes only and does not infringe on the rights of the copyright owners. If any copyrighted material has been used without proper credit or in violation of copyright laws, it is unintentional and we will rectify it promptly upon notification. Please note that the republishing, redistribution, or reproduction of part or all of the contents in any form is prohibited without express written permission from the author and website owner. For permissions or further inquiries, please contact us.
More stories